Overview
The following sections explain in detail the capabilities of an IPT instance that has been installed, run for the first time, and tested to be functional as explained in the Getting Started Guide. The details of this guide are presented in four sections corresponding to the four "menus" available in the IPT user interface. Some tabs are only visible when a user having the appropriate rights to see them is logged in.
User interface controls
Most user interface controls have both enabled and disabled modes. If the control is enabled, it will either commit an action when clicked (a button, for example), or it will allow changes to be made to the value bound to the control (a text, check, or select box, for example). In the latter case the changes will be saved, if possible, when the form on which they appear is saved, which is generally accomplished on a given page by clicking on a button labelled "Save". Disabled controls show the value of the associated information, but do not allow that information to be saved under the conditions in effect at the time they appear. The purpose for most user interface controls is indicated by an associated label that appears above and/or to the left of the control. Sometimes supplemental information is also accessible from an associated information icon.
Menus - in the IPT, a menu bar appears on nearly every page. (On small screens, it is shown under the ☰ button). The menu is populated with menu items that guide users to fundamental topics. Menu items appear based on the what the current user is authorized to see based on their role.


Text boxes - allow textual information to be viewed or entered.
Example text box and label for an email address:

Check boxes - allow a value to viewed or set to true (when checked) or false (when unchecked).
Example check box and label to indicate that the IPT can publish resources: 
Select boxes - allows a value to be viewed or selected from a list of predefined values. A select box may contain explanatory text about the selection in place of a selectable value. In this case the selection will begin with "Select" (e.g., "Select a country, territory, or island"). Click on the select box to open it and see the list of possible values. Click on one of the choices to set that value.
Example select box and label for the user role, with Admin selected: 
Links - opens a page other than the one on which the link occurs. Links may open the new page in the same browser window (or tab) or in a separate window (or tab).
Example link: 
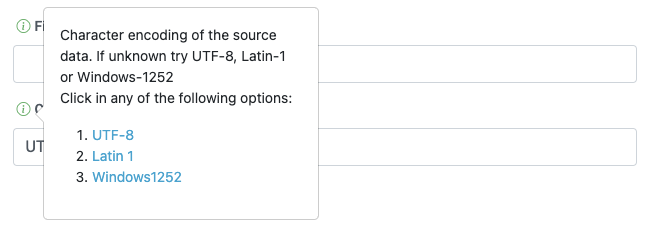
Information icon - shows a message explaining the intention of the control next to which it appears. Click on the icon next to any field to see a help message about that control. Click on any other place to make the message disappear. Some information messages include a link, which, if selected, will populate the control with the appropriate value for the selection.
Example information icon for character encoding after the UTF-8 link was selected: 
Documentation icon ![]() - this icon indicates that there is a detailed information page about the subject with which the icon is associated. Click on the icon to open the page in a new browser window.
- this icon indicates that there is a detailed information page about the subject with which the icon is associated. Click on the icon to open the page in a new browser window.
Trash icon ![]() - this icon is associated with other controls on the page. Clicking on the icon will delete the associated data.
- this icon is associated with other controls on the page. Clicking on the icon will delete the associated data.
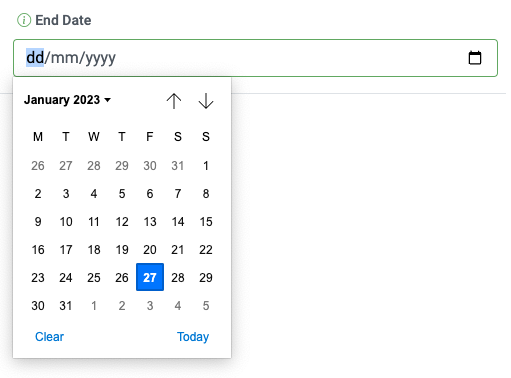
Calendar icon ![]() - this icon is associated with a text field meant to contain a date. Clicking on the icon opens a small calendar with controls that allow the user to scroll forward and backward from the currently selected month and year, select boxes to choose a different month or year, and days of the week arranged in a standard New Era calendar. Selecting a specific day will place the date in the correct format into the associated text box.
- this icon is associated with a text field meant to contain a date. Clicking on the icon opens a small calendar with controls that allow the user to scroll forward and backward from the currently selected month and year, select boxes to choose a different month or year, and days of the week arranged in a standard New Era calendar. Selecting a specific day will place the date in the correct format into the associated text box.
Example calendar associated with an text box labelled "End Date" in which 31 Dec 2010 is the current date but not yet selected:

Sortable Table - a table that allows the rows to be sorted by the values of a selected column in ascending or descending order. The column headers are the labels for the columns, which appear as links. Click on a column header to sort the table using the values in that column. Click again on the same column header to sort the table in the opposite direction.
Example table sorted in ascending order by the column labelled "Organization name".

Example table sorted in descending order by the column labelled "Alias".

File upload
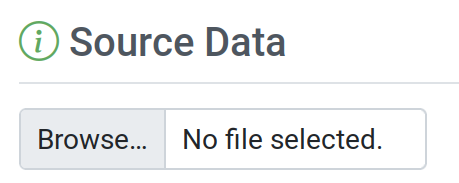
The IPT allows uploading files when (creating a new resource, or when adding new source data files)


Controls that appear on all pages
This section describes several features that are accessible in the header and footer of most of the pages of the IPT.
Header
The header section of the IPT appears in the upper right of most pages and allows basic control over the IPT, including who is using it, and in what language. Following are two screen images showing the two possible states in which the header may be found - logged in, and not logged in.
Header, not logged in, English language chosen for the user interface:

Header, logged in, English language chosen for the user interface:

-
Login - A user who has already been created in this IPT instance can log in by entering the email address and password in the login form, and then click on the "Login" button. Only an existing user having the Admin role can create new users. The process for creating new users is explained under the "User accounts" heading in the "Administration Menu" section. The process of initializing the IPT creates the first user having the Admin role.
-
Logout - If someone is logged in to the IPT, the initials of the person who is logged in is given in the upper right-hand corner of the page. Clicking on this reveals a dropdown with a "Logout" link.
-
Account - To see this link and the page to which it leads, you must be logged into the IPT. The page shows the details of the account information for the person who is logged in to the IPT and allows them to be changed. The details of the fields found on this page can be found under the "User accounts" heading in the "Administration Menu" section.
-
Language selection - In the upper right-hand corner of the page is an icon allowing the display language of the IPT to be changed. The default language for the IPT is English. The language of the user interface can be changed by selecting a name for the desired language, if available. GBIF actively seeks translations for the IPT into additional languages. For more information, consult the How to Translate page.
-
Health status - Also in the upper right-hand corner of the page is an icon for the "Health Status" page. This shows some information useful for troubleshooting, such as whether the IPT can contact GBIF’s servers, available disk space and (for logged-in users) server version information.
Footer
The footer section of the IPT appears along the bottom of most pages and contains information about the IPT version and links to important resources.

-
Version - At the left of the footer at bottom of the page is the version of the IPT that is currently running. The version information can be used to determine which features are included in the IPT and what bugs are known to exist. This is the version information that is requested when making bug reports.
-
About the IPT - This link leads to the IPT website, where further information about the IPT can be found, including the version history, roadmap, uptake statistics, and further related documentation.
-
User Manual - This link opens the most recently released online version of the IPT User Manual.
-
Report a bug - This link opens the list of known open issues for the IPT. If you think you have encountered a bug, look at the list of known issues first to see if the bug has already been reported. If it has, you may add new information as a comment to the existing bug report that might help engineers to diagnose the problem and get it fixed. If no bug similar to the one you have encountered in the IPT appears on the list, you can create a new bug report by clicking on the "New issues" link. When entering a bug report, it is useful to include the version of the IPT you are using (see the explanation for "Version", above).
-
Request new feature - This link opens a specific form in the IPT issue tracker that can be filled in to request a capability that the IPT does not currently have.
-
Copyright - The copyright for the IPT software is held by the Global Biodiversity Information Facility. A link to the home page for GBIF is provided. Details of the copyright and licensing can be seen in the "About the IPT" section of this user manual.